Recessed Medicine Cabinet Guide: Sizing, Installation & Buying Tips
Recessed Medicine Cabinet Guide: Sizing, Installation & Buying Tips
Everything you need to plan, size, and install a recessed medicine cabinet the right way — plus a side-by-side look at real cabinets you can order today.
What's in this guide
What Is a Recessed Medicine Cabinet?
A recessed medicine cabinet is built into the wall itself, sitting flush (or nearly flush) with the drywall instead of protruding into the room like a surface-mounted unit. Installers cut a rectangular opening between two wall studs, slide the cabinet box into that cavity, and trim it out so the mirrored door sits nearly level with the wall surface.

The main appeal is the clean, built-in look — no bulky box sticking out over your sink — plus a few extra inches of usable depth since the cabinet borrows space from inside the wall rather than the room. The trade-off is that installation is more involved than hanging a surface-mount cabinet, since you're cutting into the wall and need to confirm there's no plumbing, wiring, or structural blocking behind it.
Many modern cabinets — including every model in the roundup below — are actually dual-mount, meaning the same unit can be installed recessed (in-wall) or surface-mounted (on the wall), giving you flexibility if you're not sure which route fits your bathroom.
Sizing: How to Choose the Right Dimensions
Medicine cabinet sizes are listed as width × height (e.g., 20"W × 26"H). Getting the size right matters more than any other decision, since it affects both how the cabinet looks over your vanity and whether it will physically fit inside your wall.
General sizing guidelines
| Bathroom / Vanity Type | Suggested Cabinet Width | Suggested Height |
|---|---|---|
| Powder room / small pedestal sink | 14"–16" | 18"–24" |
| Standard single vanity (24"–30") | 16"–20" | 24"–26" |
| Larger single vanity (30"–36") | 20"–24" | 26"–30" |
| Double vanity, one cabinet per sink | 16"–20" each | 26"–30" |
| Double vanity, one long cabinet | 36"–48"+ | 26"–32" |
Rules of thumb
- Center it over the sink, not the vanity cabinet below — sink and vanity aren't always aligned.
- Leave 3"–5" of width on each side from the edges of the sink to the cabinet edges as a visual guide.
- Match or slightly narrow the cabinet width to your light fixture above, so the mirror doesn't awkwardly overshoot the sconce or bar light.
- Bottom edge should sit roughly 4"–8" above the faucet or backsplash, and the top of the mirror should reflect your face comfortably at your typical standing height.
- For double vanities, a single wide cabinet (36"–64") usually looks cleaner than two smaller ones unless you want separated his-and-hers storage.
Wall Depth & Stud Considerations
Depth is where recessed installations get technical. Standard interior walls are framed with 2×4 studs, which after drywall on both sides leave a cavity of roughly 3.5" deep. Most recessed medicine cabinets are designed around this exact depth, but you should always check the product's cabinet-box depth (not just the door/frame depth) before buying.
What to check before you buy
- Cabinet box depth — the actual depth of the recessed portion, usually 3"–4" for standard cabinets.
- Wall type — exterior walls, walls with plumbing (like a shared plumbing wall), or 2×6 framed walls behave differently than a typical interior partition wall.
- Obstructions — pipes, electrical wiring, HVAC ducting, or fire blocking inside the wall cavity can prevent a full recess even if the studs are spaced correctly.
- Insulation — exterior or shared walls are often insulated, which can reduce usable depth and may raise energy/moisture concerns if you cut into it.
If your wall can't accommodate a full recess (too shallow, or blocked by plumbing), a dual-mount / surface-mount cabinet is the easier fix — it sits on the wall instead of in it, so depth constraints disappear and installation is closer to hanging a heavy mirror.
Rough Opening: How to Cut It Correctly
The "rough opening" is the hole you cut in the drywall to slide the cabinet box into. Cutting it accurately is the difference between a cabinet that sits flush and trims out cleanly, and one that leaves gaps or won't fit at all.
- Find the studs. Use a stud finder to locate the studs on either side of your planned cabinet location. Most cabinets are designed to fit between two 16" on-center studs, but always check the manufacturer's specified rough opening dimensions first.
- Mark the rough opening. Use a level to draw the exact rectangle from the product's installation manual (typically slightly larger than the cabinet box itself — check the spec sheet, this varies by model).
- Check for obstructions. Drill a small pilot hole inside the marked area and use a bent wire or drywall inspection camera to feel/look for pipes or wiring before making the full cut.
- Cut the drywall. Use a drywall saw or oscillating multi-tool to cut along your marked lines, cutting only through the drywall — not into the studs.
- Frame the opening if needed. If the opening is wider than the stud spacing, you'll need to add horizontal 2×4 blocking (a "header" and "sill") between the studs to support the cut edges and give the cabinet something solid to screw into.
- Dry-fit the cabinet. Slide the cabinet box into the opening before final installation to confirm it fits and sits flush, adjusting the opening slightly if needed.
- Secure and trim. Screw the cabinet into the studs or blocking per the manufacturer's instructions, then caulk around the edges for a finished, gap-free look.
Step-by-Step Installation (Recessed & Surface Mount)
Most modern medicine cabinets — including every model featured below — support both recessed and surface installation from the same box. Here's the general process for each.
Recessed installation
- Confirm wall depth, stud spacing, and check for plumbing/wiring (see the Depth and Rough Opening sections above).
- Mark and cut the rough opening to the manufacturer's exact specifications.
- Add blocking between studs if the opening spans more than the standard 16" stud bay.
- Slide the cabinet box into the opening and check it's plumb and level with a bubble level.
- Screw the cabinet flange into the studs or blocking (most cabinets include mounting screws).
- Caulk the perimeter where the cabinet meets the wall for a seamless finish.
- Attach or hang the mirrored door per the included hardware, then adjust the hinges so it closes evenly.
- If the model is lighted, connect to a hardwired junction box or plug into a nearby GFCI outlet, depending on the power option you chose.
Surface-mount installation
- Mark your desired height and center line directly on the wall (no cutting required).
- Locate studs and mark mounting bracket positions, or use heavy-duty drywall anchors if studs don't align with the mounting points.
- Attach the mounting bracket or French cleat to the wall, level and secure.
- Hang the cabinet on the bracket and confirm it's seated and level.
- Secure any additional safety screws through the cabinet back into the wall/studs.
- Connect power if the unit is lighted (hardwired or plug-in, per your model).
Replacing an Old Medicine Cabinet
Swapping an existing recessed medicine cabinet for a new one is usually much easier than a first-time install, since the wall opening already exists. That said, a few things commonly trip people up:

Before you remove the old cabinet
- Measure the existing rough opening (width, height, and depth) before shopping — this is your biggest constraint. New cabinets almost never match an old opening exactly.
- Photograph the wiring if your old cabinet was lighted or had an outlet, so an electrician (or you) can reconnect the new one correctly.
- Check for a metal or wood liner box inside the wall — some older installs have a separate liner that the cabinet slides into, which changes your usable opening size.
Common replacement scenarios
| Situation | Best Approach |
|---|---|
| New cabinet is smaller than the old opening | Add drywall/blocking to fill the gap, or choose a surface-mount trim kit that covers the larger hole. |
| New cabinet is larger than the old opening | Enlarge the rough opening following the same stud-check process as a new install. |
| Old cabinet was surface mounted | Patch and paint the old mounting holes, then either recess a new one (cut opening) or surface mount the replacement over a fresh set of anchors. |
| You want to add lighting/outlets that weren't there before | Budget for an electrician to run power to the location before ordering a lighted cabinet. |
Shop Recessed & Surface-Mount Medicine Cabinets
Once you know your ideal size, depth, and mounting style, here's a side-by-side look at real dual-mount cabinets — with pricing, ratings, and honest pros and cons — to help you compare before you buy.
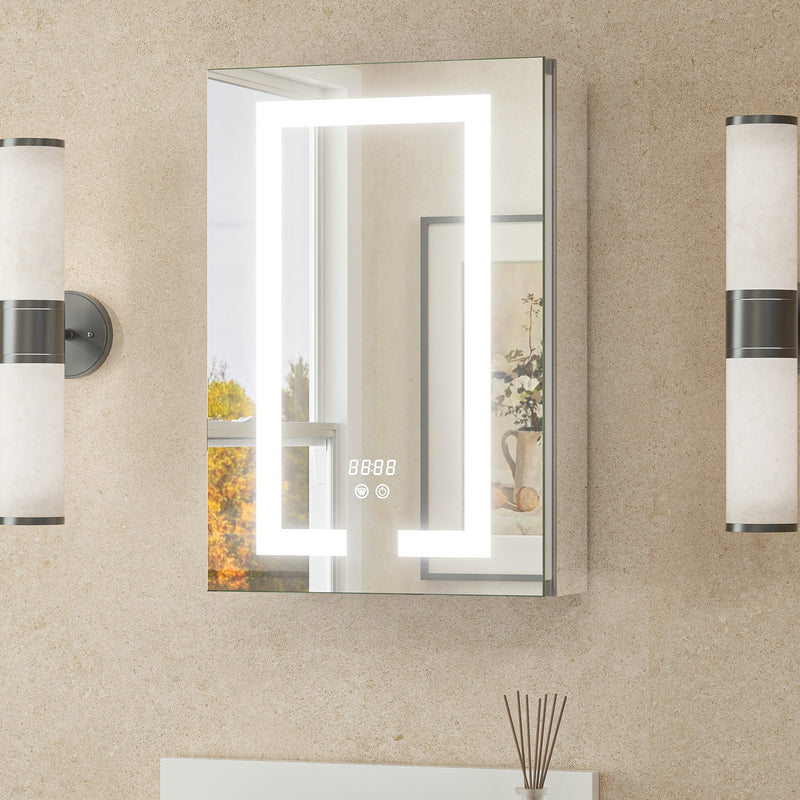
Dual-Lit LED Medicine Cabinet
ETL-listed cabinet with double-sided 3-color dimmable LED lighting, defog, a Bluetooth clock, 2 outlets + 2 USB ports, and adjustable tempered-glass shelves. Recessed or surface mount, 9 size options.
Pros
- Built-in outlets + USB charging
- 3 color temps, stepless dimming
- Fast anti-fog defogger
Cons
- Highest price in this roundup
- Needs power hookup (plug-in/hardwire)
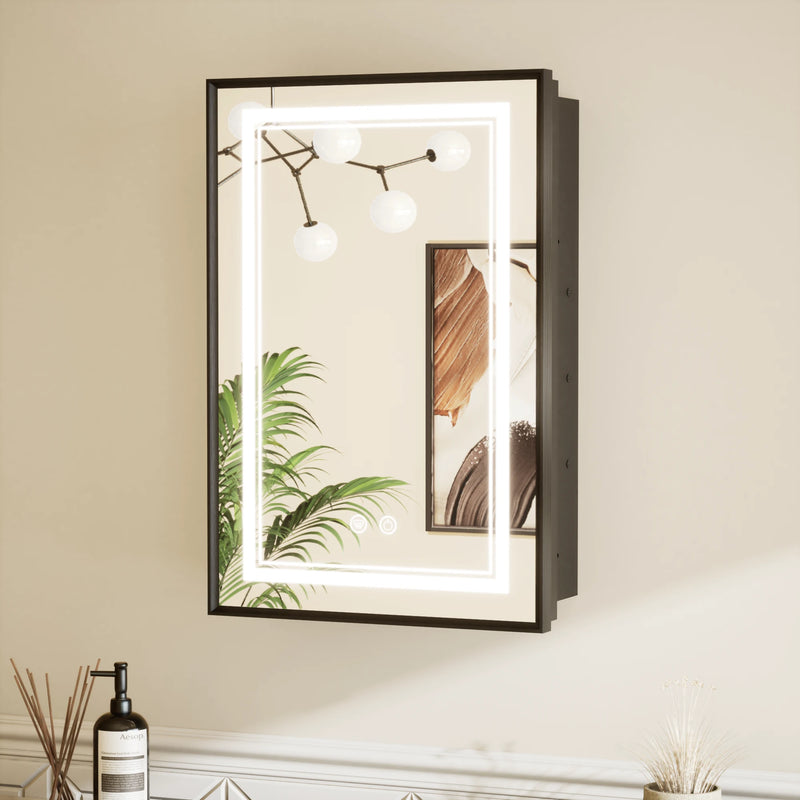
Framed LED Medicine Cabinet
Brushed aluminum-framed cabinet with 3-color dimmable lighting, 2 built-in outlets, an IP44 waterproof rating, and soft-close magnetic doors. Available in black or white, 5 sizes.
Pros
- IP44 waterproof rated
- Biggest discount of the lighted models
- Soft-close magnetic hinges
Cons
- Fewer sizes than the top pick
- Only 2 color finishes
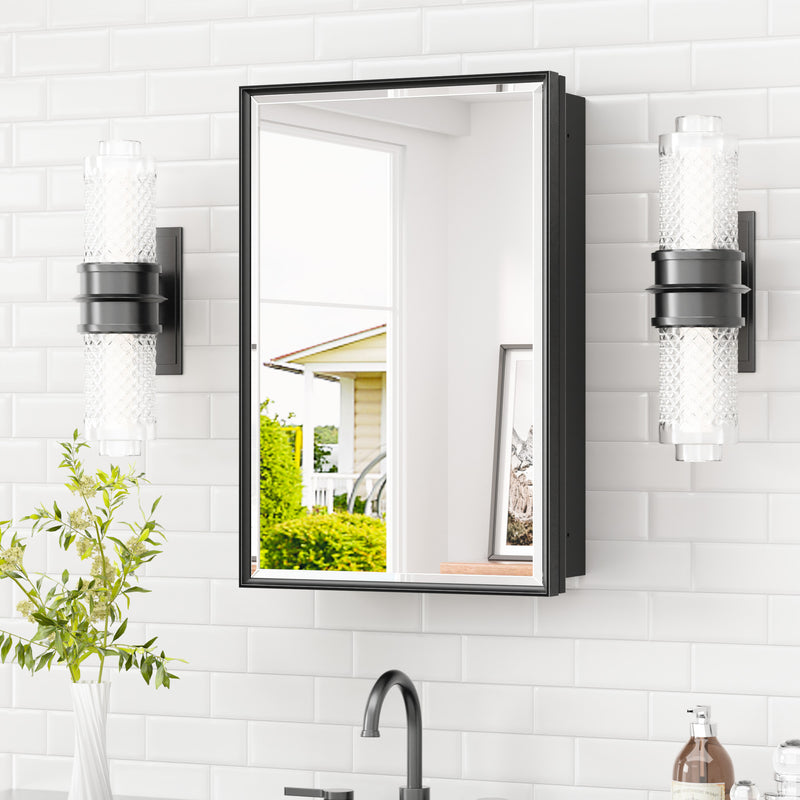
Beveled Medicine Cabinet with Mirror
A no-frills beveled-edge cabinet with a copper-free, shatter-proof mirror and double adjustable shelves. Reversible door for left- or right-hand opening, up to 60"W available.
Pros
- Widest size range (up to 60"W)
- No power/wiring needed
- 3 finish options
Cons
- No lighting or outlets
- Larger sizes get pricey ($589–$639)
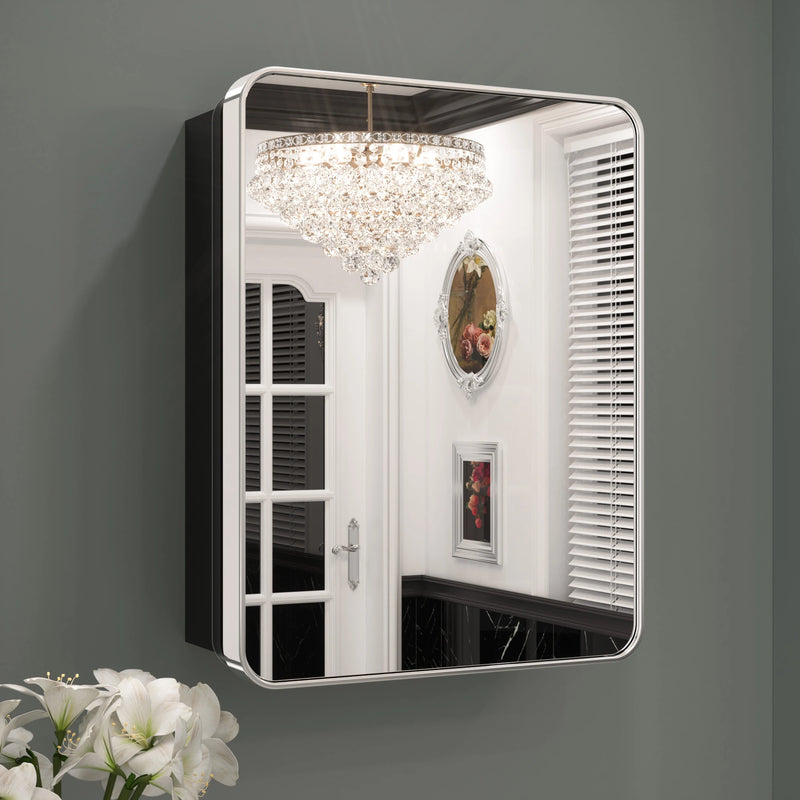
Stainless Steel Framed Medicine Cabinet
A rust-resistant stainless steel frame with a silent magnetic-catch door, rounded corners for safety, and a shatterproof HD mirror. Reversible door, available in black, gold, chrome, and brushed nickel.
Pros
- 4 finish choices
- Lowest starting price of the framed models
- Rounded, family-safe corners
Cons
- No lighting
- Some finish/size combos sell out fast
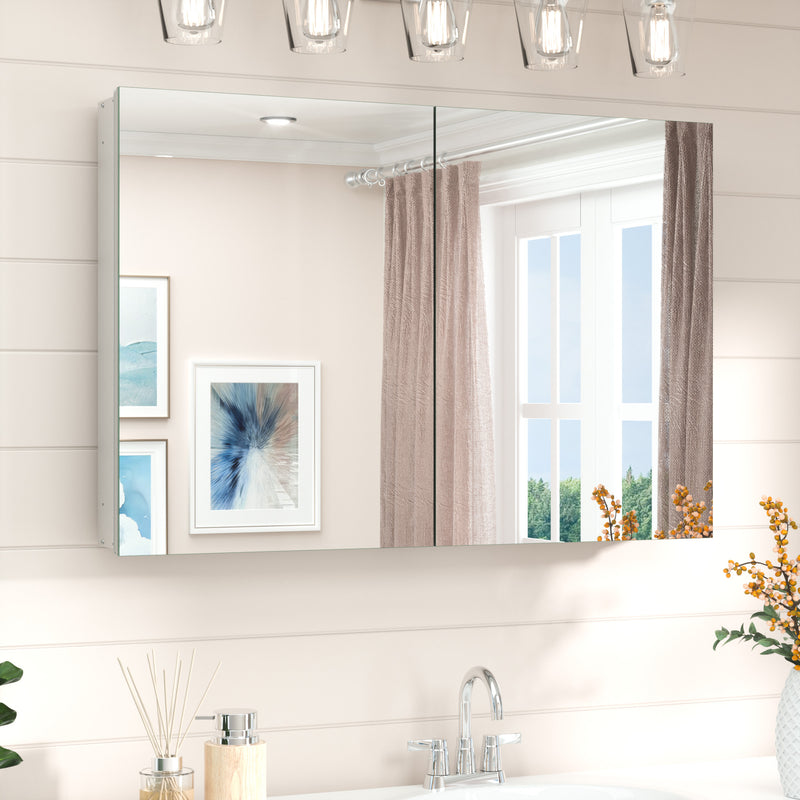
Recessed Medicine Cabinet
The most affordable option, with the widest size lineup of any cabinet here (19 sizes from 14x18 up to 64x32). Soft-close DTC hinges, removable adjustable glass shelf, and video-guided assembly.
Pros
- Highest rating in this roundup
- 19 sizes — easiest to fit an existing opening
- Lowest entry price
Cons
- Requires assembly
- Silver finish only

Medicine Cabinet Mirror with Lights
The newest addition to the lineup, available in silver and black across 6 sizes (24x16 up to 32x48). A good option if you want a fresh design not yet broken in by hundreds of reviews.
Pros
- Newest design in the collection
- 6 size options
Cons
- No customer reviews yet
- Limited to 2 finishes
Pricing, ratings, and review counts reflect the collection at the time of writing and may change — check the product page for current availability.
Frequently Asked Questions
Can any medicine cabinet be recessed, or only ones labeled "recessed"?
What's the standard rough opening size for a recessed medicine cabinet?
Can I install a recessed medicine cabinet on an exterior wall?
Do I need an electrician to install a lighted medicine cabinet?
How much does professional installation typically cost?
What if my rough opening doesn't match any cabinet's size exactly?
Recessed vs. surface mount — which should I choose?
Do medicine cabinets come with mounting hardware?
Ready to find your fit?
Browse every size, finish, and lighting option in the full recessed & surface-mount collection.
Shop Medicine Cabinets →